Welcome to my Blog
Monday, 25 October 2010
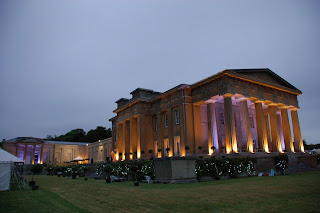
Location

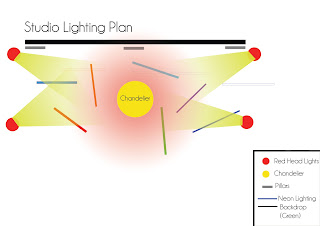
Lighting Plan
Schedule for Shoot Day
09:00am – Organise set and Band and Camera, etc.
09:30am – Start Shooting on Freddie, as lead singer and will have more confidence.
10:30am - Break.
10:45am – Start to experiment with shots, and other members of the band.
11:00am – Shoot tracking shots.
11:30am – Break.
11:45am – Experimental shots.
12:00am – Shoot close ups.
12:30pm – Lunch.
01:15pm – Start shooting lighting on floor, low angles, mid and wide shots.
02:00pm – Wide shots, side, front and above the band.
03:30pm – Break.
04:00pm - Start to experiment with shots.
05:30pm – Pack up and clear up set, if finished.
06:00pm – Supper.
Call Sheet
Song: Gotta Little Soul
Date Of Shoot: Friday 5th November. 2010
Names: Hugo Carnegie-Brown
Band Names: TOM PHELAN (guitar, vocals) - 07870883151
: MIKE RUANE (drums) - 07885274308
: Freddie Dickson (Lead singer and guitar)
Cast List: Oscar Mitchell-Heggs (Trumpet Player)
: Tom Phelan (Guitar, Vocals)
: Mike Ruane (Drums)
: Freddie Dickson (Lead singer)(Guitar, Vocals)
Studio Lighting Plan: In Section Info on Music Video in this File.
Studio Set Plan: In Section Info on Music Video in this File.
Prop List: In Prop List Section In this File (Section 10)
Schedule for shoot day: In this File (Section 5)
Storyboard: In this File (Section 3)
Lyrics: In Section Info on Music Video in this File.
Shot List Order: : In Section Schedule of the day (Section 5)
Thursday, 14 October 2010
Lyrics
Walking down the street last night,
shadow of the wind crawls behind,
and ime holding onto what ive got,
cos my heart feels so inclined,
and ime not gonna throw it all away x2
And you give a little laughter, cry a little joy. its not that hard to do,
And you give a little laughter, cry a little joy, well ime holding onto you,
Gotta little soul in you
Soul in you x2
Walking down the street last night,
shadow of the wind crawls behind,
well ime holding onto what ive got,
cos my heart feels so inclined,
and ime not gonna throw it all away, x2
And you give a little laughter, cry a little joy. its not that hard to do,
And you give a little laughter, cry a little joy, well ime holding onto you,
Gotta little soul in you
Soul in you x3
and how long must i wait for you,
and how long
must i wait for you
and how long
must i wait for you, wait for you
must i wait for you x2
how long, must i wait for you, yeah, yeah
Saturday, 2 October 2010
Costumes
Here is a Picture of Freddie's style of clothing:
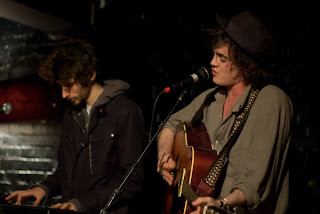
As you can see that he has a hippy look, so the image of the band genre fits in really well with his look.
Shot styles
Close up
A close up shot is really useful as it can show emotion, and the expression on the person's face. Close ups are really interesting to use for high detail.
Mid Shot
Mid Shots are also used to capture upper body movement, especially hand gestures. It is still a shot that can help reveal facial emotion. Mid shots are used often in between Close up's the reason for this is because Close up shots can come across as quiet intrusive the viewer may start to feel slightly uncomfortable.
Long Shot
Long shots are really good to show the full body and a slightly revealing for the set. They are also used to create a sense of where the shot is, either on the set, or a chosen location that I would use for Freddie
Wide Shot
A wide shot is mainly used in film and movies as an establishing shot. This will help the audience to capture what is going on and allow them to not miss out on crucial detail that they may miss out on if a close up was used. This is mainly at an ending shot, because you want to hold the revealing end shot near to the end of the video.
Research: Style of my music video
Here is the style of Music video that I am aiming towards, by how it is filmed. I am only going to change the boy and girl theme to where half of it is shot in the studio (with low key lighting). The other half of my chosen locations, is that I am going to decide on a final 8 locations to shoot at. The reason why I am shooting in this style, because I know that it would be too original to just shoot a video about a boy and girl in love. As it has been done in nearly every video about a boy and a girl, meeting each other.
Here is the Music video that was uploaded onto YouTube, of the Busking for Cancer Gig that I went to in Camden:
The singer in this phone video is Freddie Dickson, This is his new song that is coming out this week. The song that i chose to use is called 'Get a little soul', I chose this song because it fits my idea, upbeat. But most importantly it will keep the viewers interested. I really like this song as it is annoyingly quite a catchy song!
Sunday, 19 September 2010
The Five Stages of Production
Stage 1: Research and development
Research and Development is used to find out where the best possible gap in the market is, and to target the right type of audience you video is aimed at. As you want your video to sell. To sell something, you need to convince the buyer into the product, as you want to persuade them into buying your product. To do this you need to show the target audience what they want to see. Research is a key part to form a music video, as you need to find out what your target audience’s taste in music is like, so you can attract as many people towards your product. Your product has to be an original idea, but in the same area as your target audience taste in music. This is so the video wont be so outrageously strange and different, but within the gap in the market.
Stage 2: Pre-Production
With the Pre-Production, organization is a key role in this area of the music video. The Props involved, costumes and the image. The shoot day has to be run smoothly so that everything is well planned out. Organization is a very important role, to making it work well on the day. This is so it will help on the shoot day to be able to experiment with the camera for different effects and styles.
Stage 3: Production – The shoot day
Location is a key part to the time that is used getting to where you want to shoot, as there is only one day to shoot the whole video. This also means money if you want to hire out a certain area to shoot in. Sadly the more money you put into the video the better it will look, as this is a noticeable fact from the thrillers that we did last year. But then you could do the reverse of a high concept styled music video and go for hand held camera movement. This then goes into the style and the bands image that is shown in the video, so this has to be done very well.
Stage 4: Post-Production – Editing
The editing stage is the brain of the whole music video, as it is needed to put it all together to make it work. The editing is one of the main processes that interest the viewer’s into buying your product. Editing can completely change the image to what you are aiming for, so it is crucial that it is correct. Editing can make the video look very professional, with special effects, colour fades, different styled cuts.
Stage 5: Distribution and Exhibition
Making your video aware to the public is vital, as the more you advertise it, the more it will sell. There are ways in advertising your video, so that it will sell more profitably. In this process all the factors need to be covered right to the photography, advertising and branding. There are ways of selling your video, by making guest appearances, on the radio and sneak previews.
Monday, 3 May 2010
Audience Feedback
"I liked the contrast from it being serene to the climax at the end"
"I thought it was awsome but the falling bit is a bit odd"
"OMG this is so professional!!! I really like it. Good job guys!"
"I don't really like it because you can see that it is a dummy and the skyline looks unrealistic."
"It's good, i love the paper but the skyscrapers at the end are a bit weird"
"I thought it was really good, and the credits were good"
"The shots were good and the music fit in really well to set the mood"
My Gordon Experiment Poster Design
Thursday, 1 April 2010
TASK 7. Looking Back at your preliminary task, what do you feel you have learnt in the progression from it to full product?
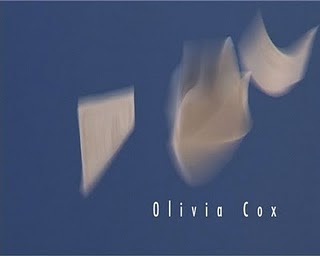
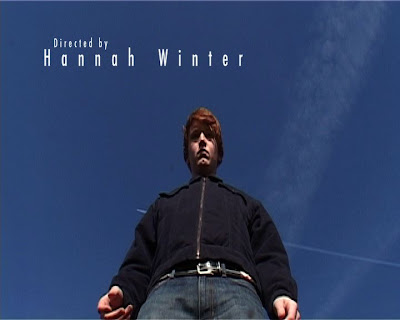
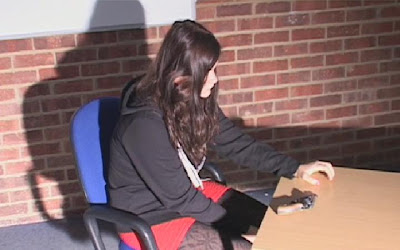

For our Thriller I thought that I had learnt so much more compared to how we shot our Preliminary Task. I really enjoyed shooting our Preliminary task, as it was a completely new experience to me. I thought it helped a lot as I now know how to shoot my Thriller correctly as I have had a bit of experience before using the camera that we shot with.
TASK 5. How did you attract/address your audience
TASK 4. Who would be the audience for your media product?

Although the film will have elements of a horror in which our target audience might not enjoy. In this style a late teen would be correctly targeted to like this product, as they may be into that genre of film.
TASK 3. What kind of media institution might distribute your media product and why?
Lionsgate have produced recent films such as ‘Saw’ and ‘Devils Rejects’. All of the films that they have produced are low budget films. Lionsgate also do festivals and presentations, which are useful to advertise and get our film seen and heard of by as many people as possible.
I know that Lionsgate Films are well known for distributing many well-known films, so it would be a selling point as it is like using a well known actor in our thriller. This is a very good reason to why we would want to use Lionsgate as our distributor.
TASK 2. How does your product represent particular social groups?

TASK 1. In what ways does your media product use, develop or challenge forms and conventions of real media product?
For our credits and titles we had to put it in a correct order to lay out the titles for a film, we did this by putting Lionsgate, Red Neck Productions, A Hannah Winter Film, actor, Actor, Editing, Photography, Music and then The title of our film. Because there were only four of us in our group we could only put a certain amount of credits in our Thriller. I did some background research before I decided were to put the credits, as I was uncertain of how they are meant to be in order.
Tuesday, 30 March 2010
Shoot Location
The reason why I liked our location so much was that we didn’t have to waste time traveling. I really liked the set up of our location, as the height of the building was good enough to film the paper falling down for the credits at the start of our thriller. It also had to be high enough so we could film our dummy falling for a second so the viewer could see what it was.
Shoot Day
On our Shoot day we had to meet in the edit suite at 9am, once Luke and Matt had arrived we then were asked to show our storyboard so they could get an idea of what we wanted to film. Once our media teachers had talked it over with us to make sure that we were happy with what we wanted to achieve on the shoot day. We then wanted to make sure the dummy was correctly set up, as we didn’t want it to break on the first jump!
Once I had finished all of the non-revealing shots we then decided to film as much paper as possible so had a lot of choice to choose from. The reason why I wanted to film the falling stock Certificates so much is because we could then get a different shot of the same paper in the air. I wanted to film the paper falling, as it was a really good idea for the start of the film for the producer and the credits with the paper falling in the background.
After I had finished filming the paper falling I wanted to get the shots on the roof so you could se how high up he was. The reason I chose a high building to shoot from was that it creates a sense of fear of falling and hitting the ground. When we were on the roof I wanted to film all the different angles so we had as much choice as possible.
On our shoot day I really enjoyed doing all of the camera work, as it was such a good experience to how I should shoot a film. It was really interesting to how I could film something that I would later edit on After Effects.
Thriller Idea
Our first Idea wasn’t that good at the start so we decided to chop and change parts of our opening sequence so it would fit better to our target. After a while we had changed our idea so much we decided to get rid of it completely and start a fresh idea.
Our thriller idea that we came up with was to be able to still use the props that we had bought so it wasn’t a waste of money and time. But to be able to still use the dummy that we made out of newspaper and clothing items.
For our thriller idea it would start off a man in a mental hospital where he then escapes out of a padded cell after assaulting a doctor and takes the keys. He then tries to find the stock certificates of himself, and goes through all the people that are at the mental hospital. You then see him running up to the roof of the building. He stands on the edge of the roof and starts throwing the paper off one side of the building. Each time he looks at the paper and sees the stock certificate for his name.
The last page of paper his name is shown on the stock certificate saying how he owned a multi millionaire business. He then looks up to the vast view in front of him and then steps up onto the side of the building and jumps off. The camera is then shown to be in one of the windows in the hospital. The viewer would then see the title of the film (Gordon Experiment) on the horizon of the view.
The use of sound in my thriller would be shown as a mysterious and secretive light. I wanted to use these types of sound to hold tension in the audience but so I don’t give away the story too fast.
Props
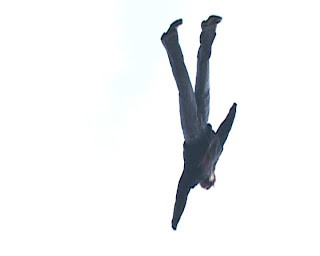 The prop list that we used in our thriller were:
Costume Design
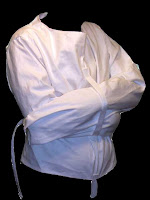 For the costume design we needed to make sure that there was a graphic match with the actor and the Dummy that was going to be thrown off the roof. To do this we just switched the jacket and trousers onto the dummy.
Because I didn’t want my actor to be dressed up in a suit or nice clothing we had to make sure his clothes fitted our character correctly. This meant he had to be quite scruffy and made to look unusual. Because he was at a mental home before he jumped off the roof.
The clothes that I chose for my character had to be original to the style of my thriller idea to make sure that it was a match.
Monday, 29 March 2010
Pre-Production Process
For the Pre-Production process it was a very important stage in our group as it meant there was less time wasted on our shoot day. Using the Storyboard for our idea was very useful as it gave use clear idea of the sequence of shots and how we wanted it to look on the shoot day. Lots of our ideas were then changed during this process, which benefited to our sequence because we could improve from our original ideas in each storyboard we did. Our costume and props list were more organized as we had more props than usual as our first idea was changed. This turned out to be a credit as we had more props and costumes.
With the Pre-Production process I learnt that in film making planning the shots is a very long process but is essential for the organization to save time on shoot day and to know exactly what you want the sequence to be like.
More detail about Research Sources
I wanted to explain the research that I learnt from various opening sequences off You Tube. I wanted to get the information about the old ideas for the opening sequences so I would be able to come up with completely fresh ideas towards my Thriller. It was really useful as I found out how the credits and titles should be presented in the correct way.
I used the opening titles of creep and Scream, as they were the most well known horrors that were closest to my thriller idea.
Using old Opening Sequences for further research really helped me in deciding what shots I thought we should add in on the shoot day.
Adobe Photoshop Editing
Adobe Photoshop is a graphics-editing program developed and published by Adobe Systems. It is the current market leader for commercial bitmap and image manipulation software. It has been described as “An industry standard for graphics professionals”. Photoshop has strong ties with other Adobe software for media editing, animation and authoring the Photoshop Documents.
I wanted to use Photoshop to create my production logo and end title credits. Photoshop is a very easy and useful application for manipulating the Production Logo, as I was very able to make a cartoon character, and enhance all of the colours. To make the text bend around my logo design I wanted it to fit perfectly or not at all. In the text layout you can get the option to bend the perspective or alter the curve line so it would fit correctly to my logo.
Friday, 26 March 2010
Production Logo
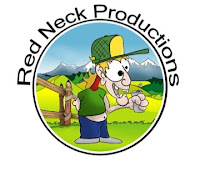
To animate it I would use After Effects because it is really useful for animating. When I started to animate my character I found it quite hard to know how to animate it.
Because I wanted to put the Text 'Red Neck Productions' on or around my logo that I designed. To put the text on my Production logo I used Adobe Photoshop CS4. I really enjoyed making the character on Photoshop, as it was really interesting knowing how they make the Production logos. Because my Logo that I designed looked quite plain and boring I decided to use a round border to mask off the edge line of the Scenery. I wanted the colors to stand out so they looked better; I re-painted all of the colors and then used dark and light tones for the colors.


